 Playable Books
Jean-Philippe Rameau · section 91 of 109
Chapter four
Read and hear this section in the playable edition →How to Find Chords on the Keyboard
We shall begin with a table of chords, in which the figures marking intervals must also remind us of each chord's composition. In accompaniment a single figure almost always denotes a chord of three, four, or five sounds. Keep clearly in mind the intervals accompanying each figure, so that you can conceive a chord's construction as soon as its figure appears. For example, if asked what accompanies the seventh, you should answer immediately: the third and fifth. The same applies to every other chord, detailed below.
List of the Most Necessary Chords
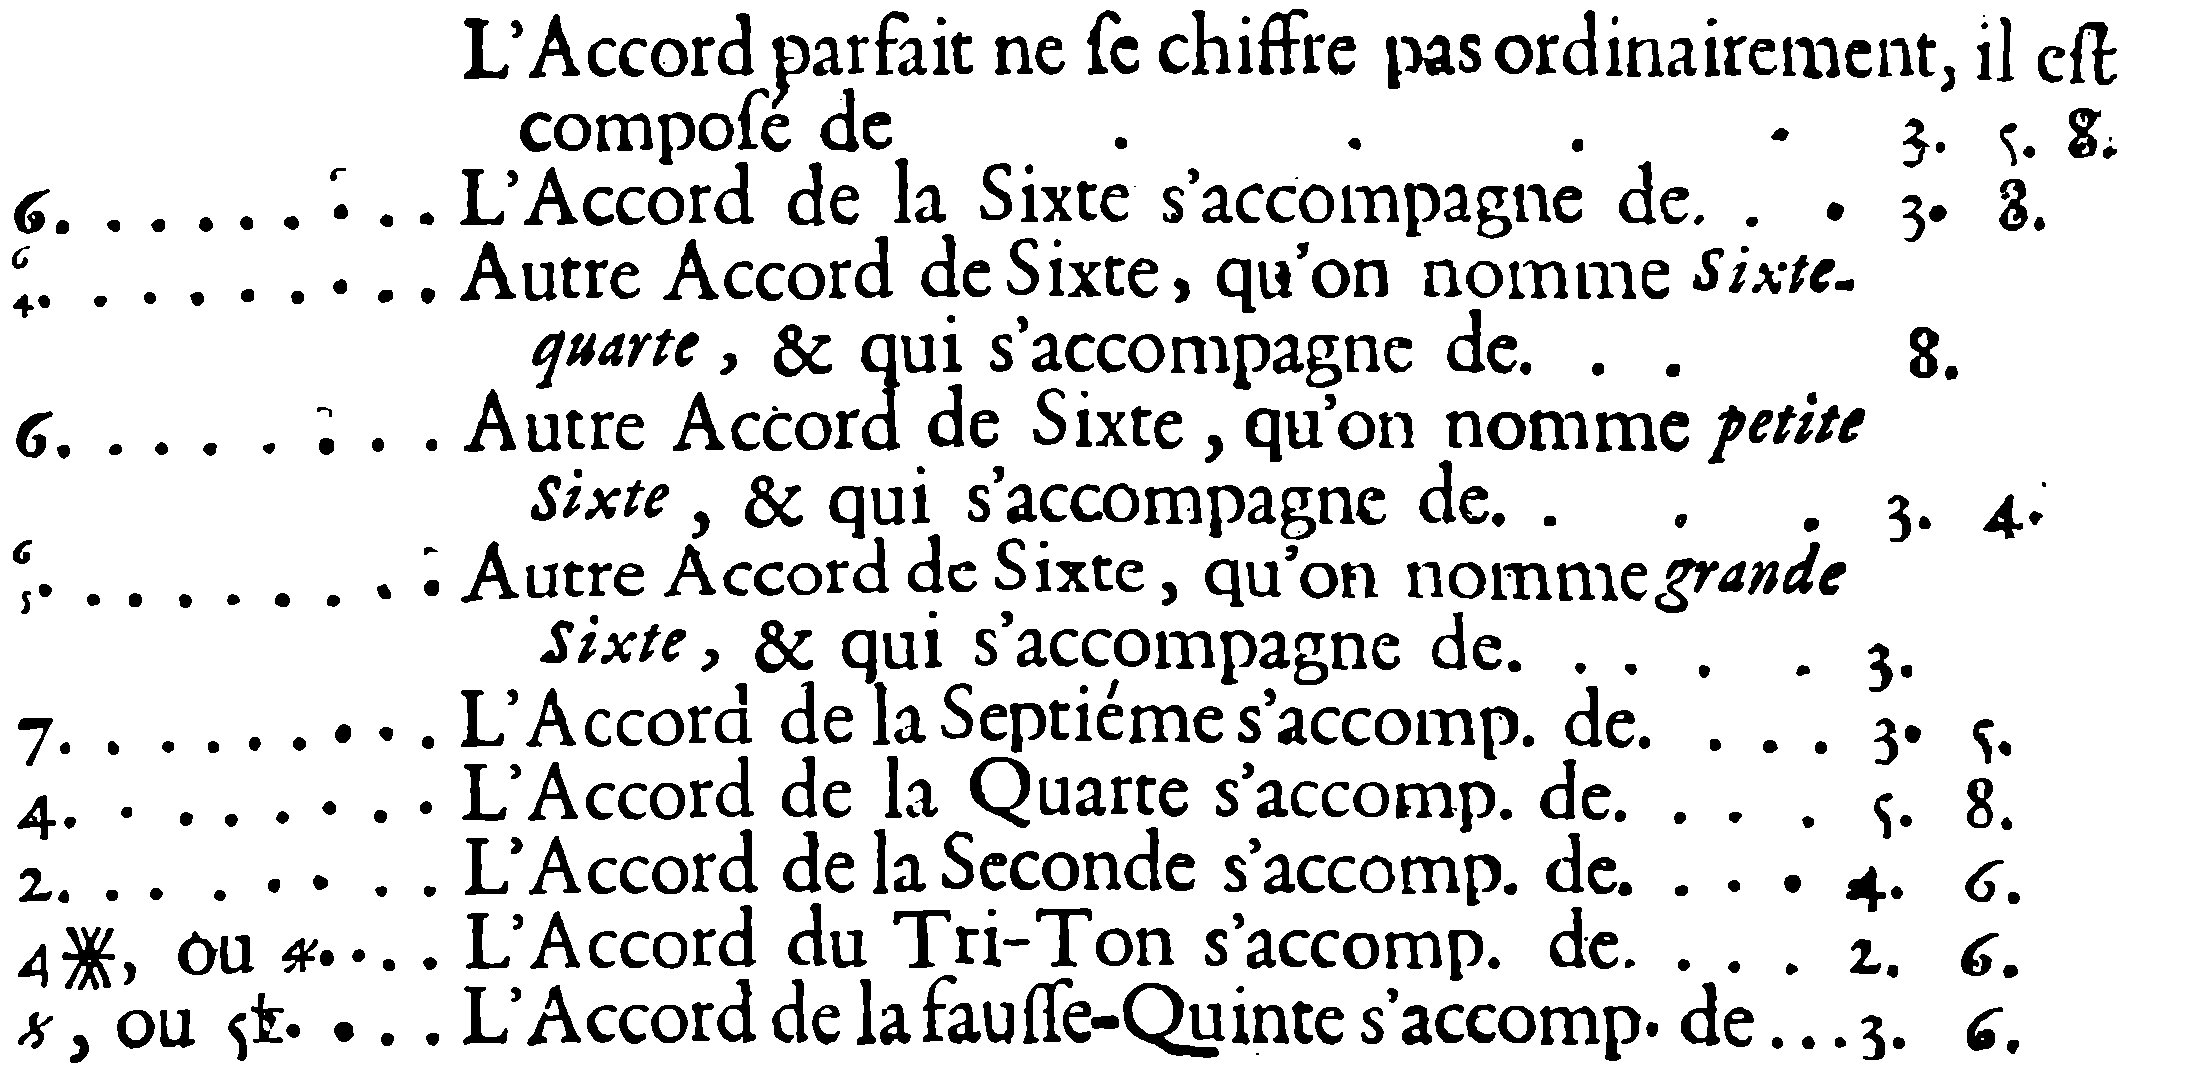
The figures mark a chord's principal intervals. Those accompanying them are almost never written, so they must be remembered.
A ♯ alone means the third must be major; a ♭ alone means it must be minor. Standing alone above or below a note, these signs indicate a perfect chord whose third has the quality they specify.
A ♯ attached to a figure enlarges its interval by a semitone; a ♭ reduces it by the same amount.
Two or more figures placed vertically belong to one chord; figures placed successively indicate as many different chords.
Turn the page for the example.
Example of the Perfect Chord and the Arrangement of the Fingers
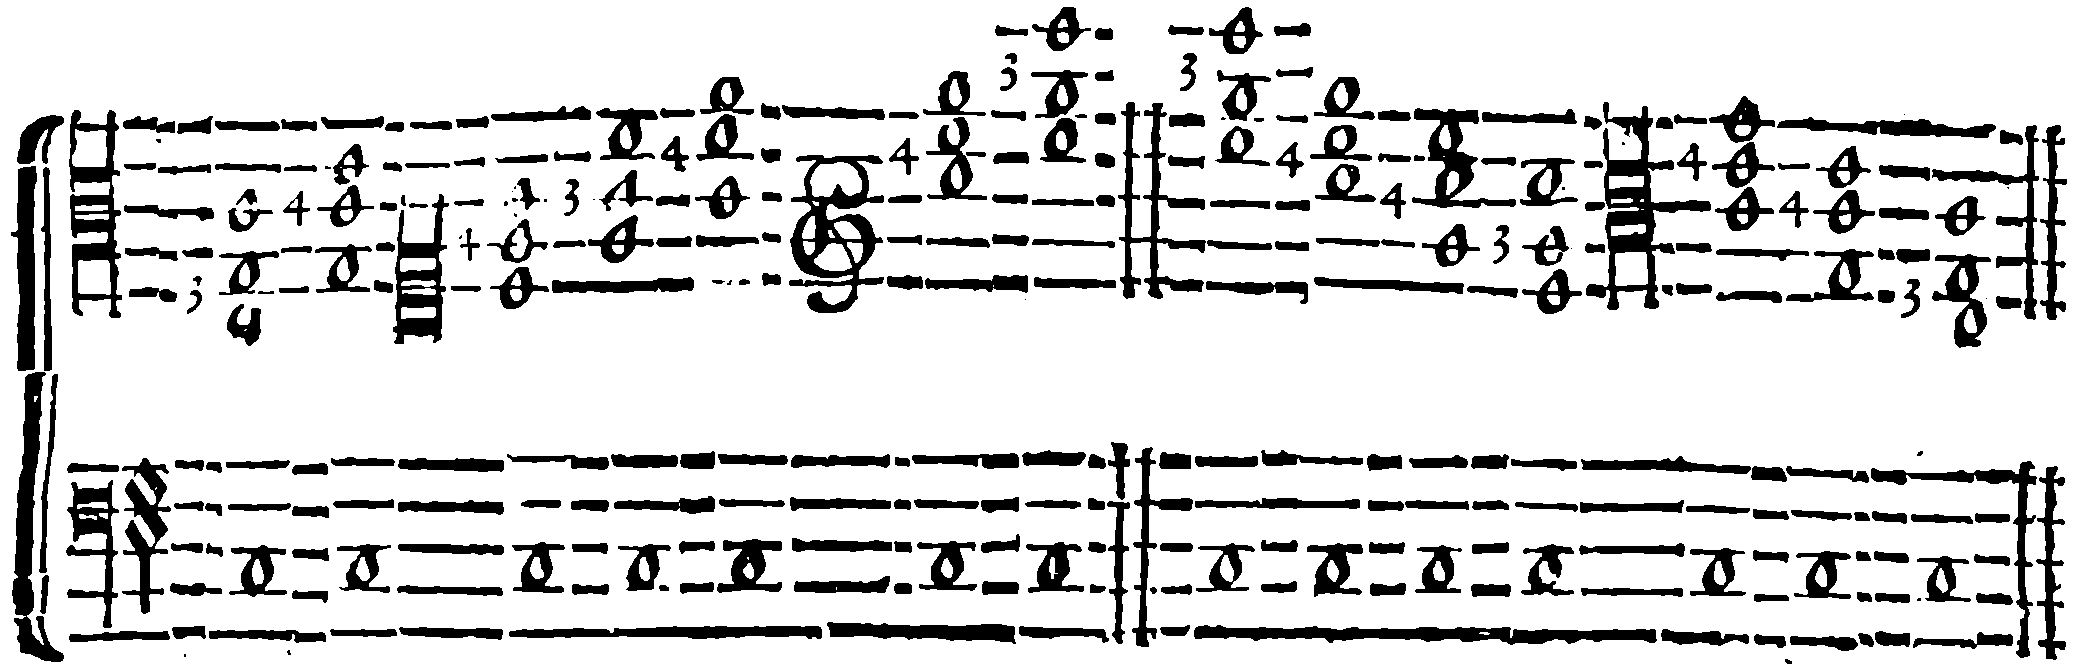
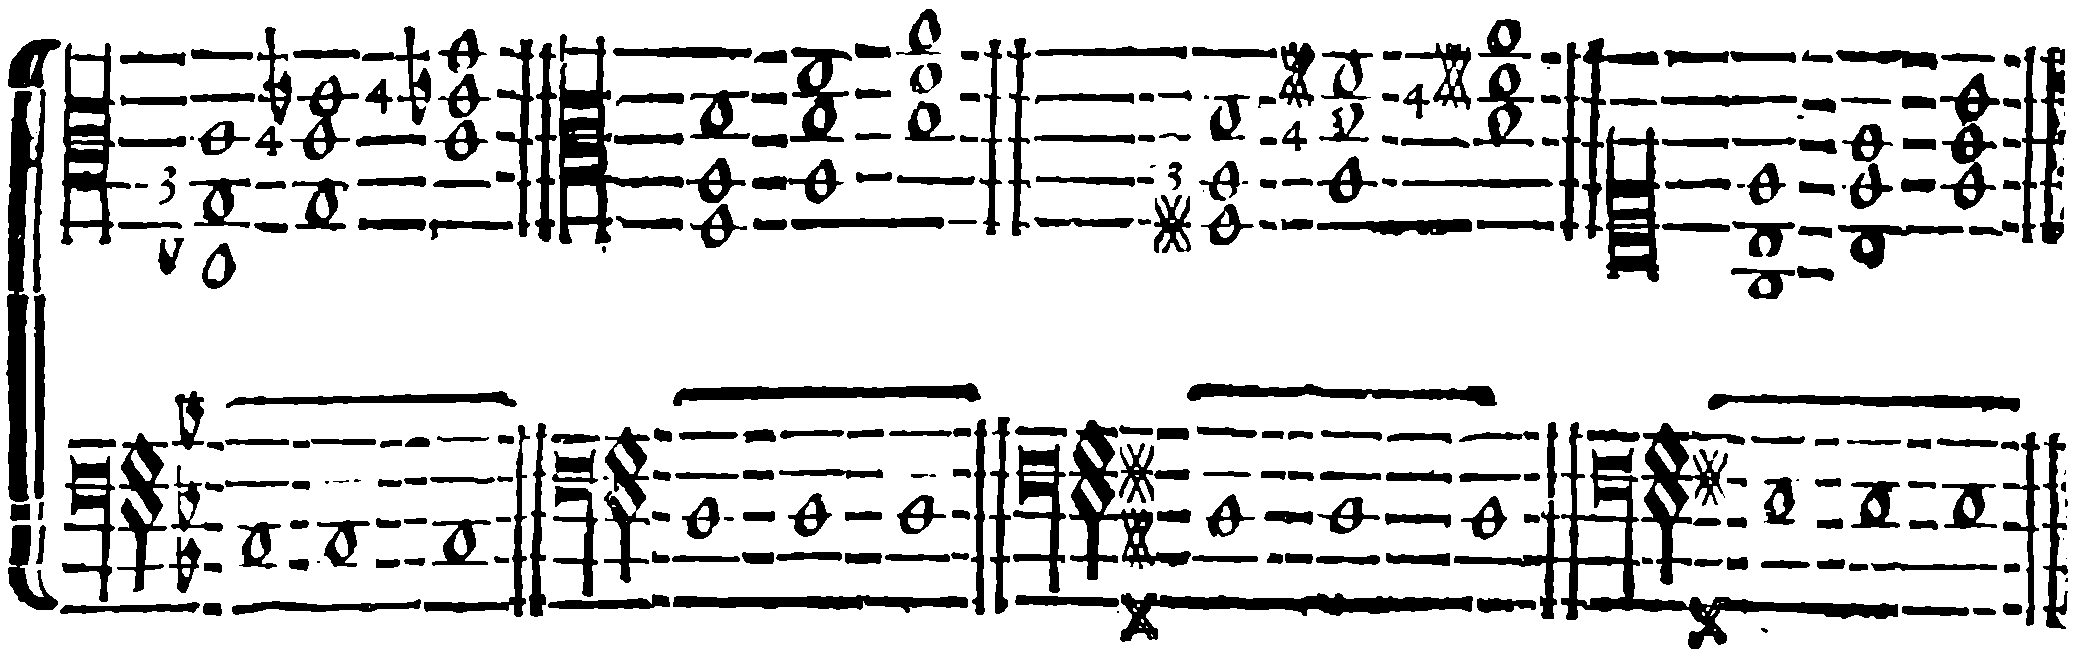
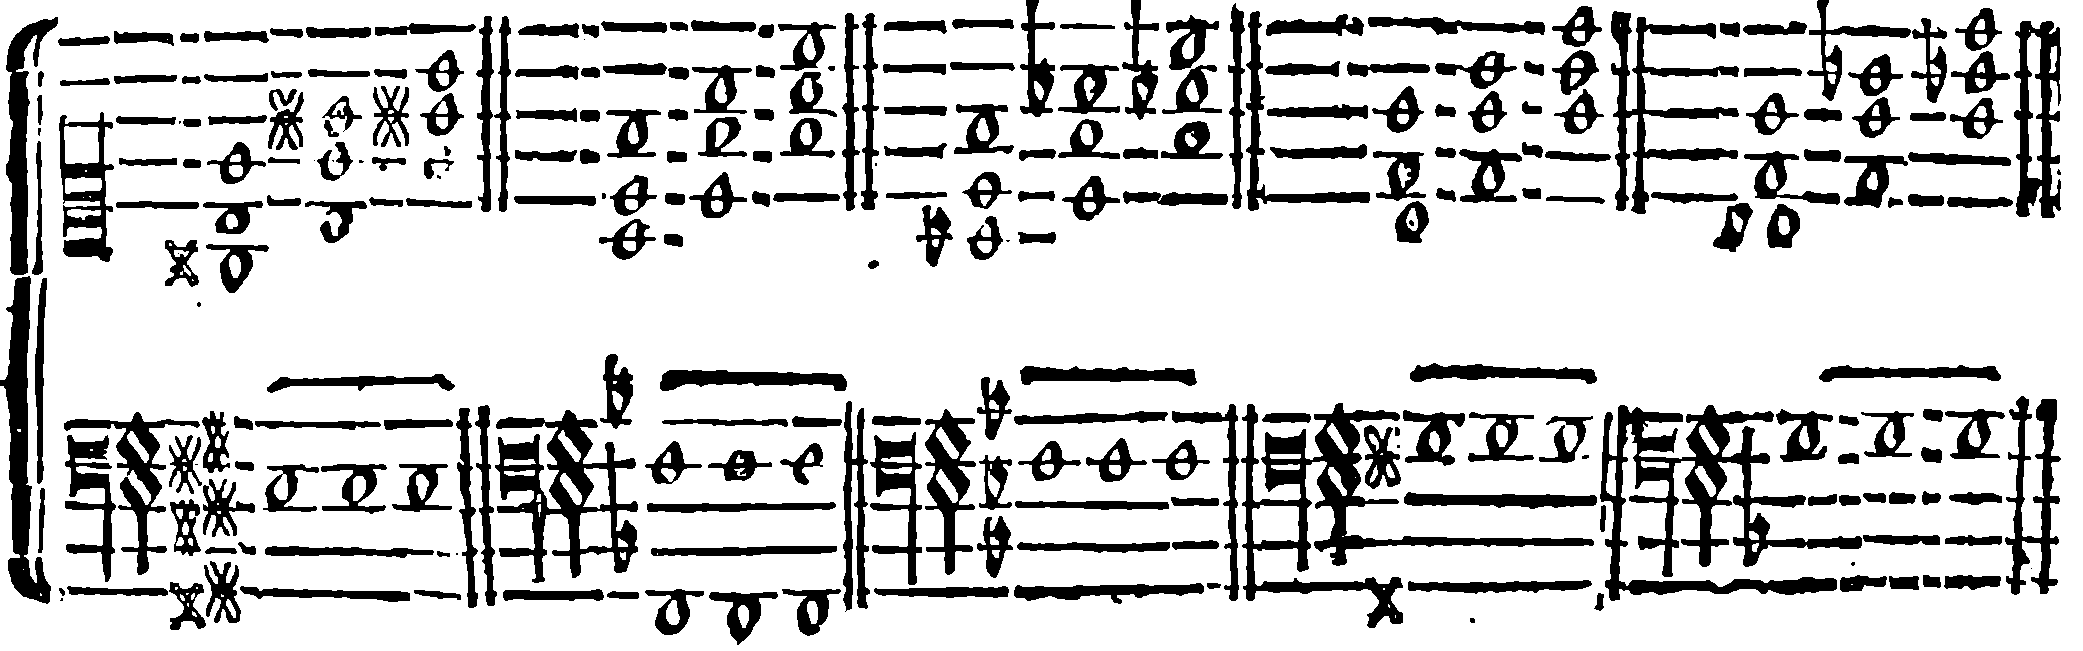
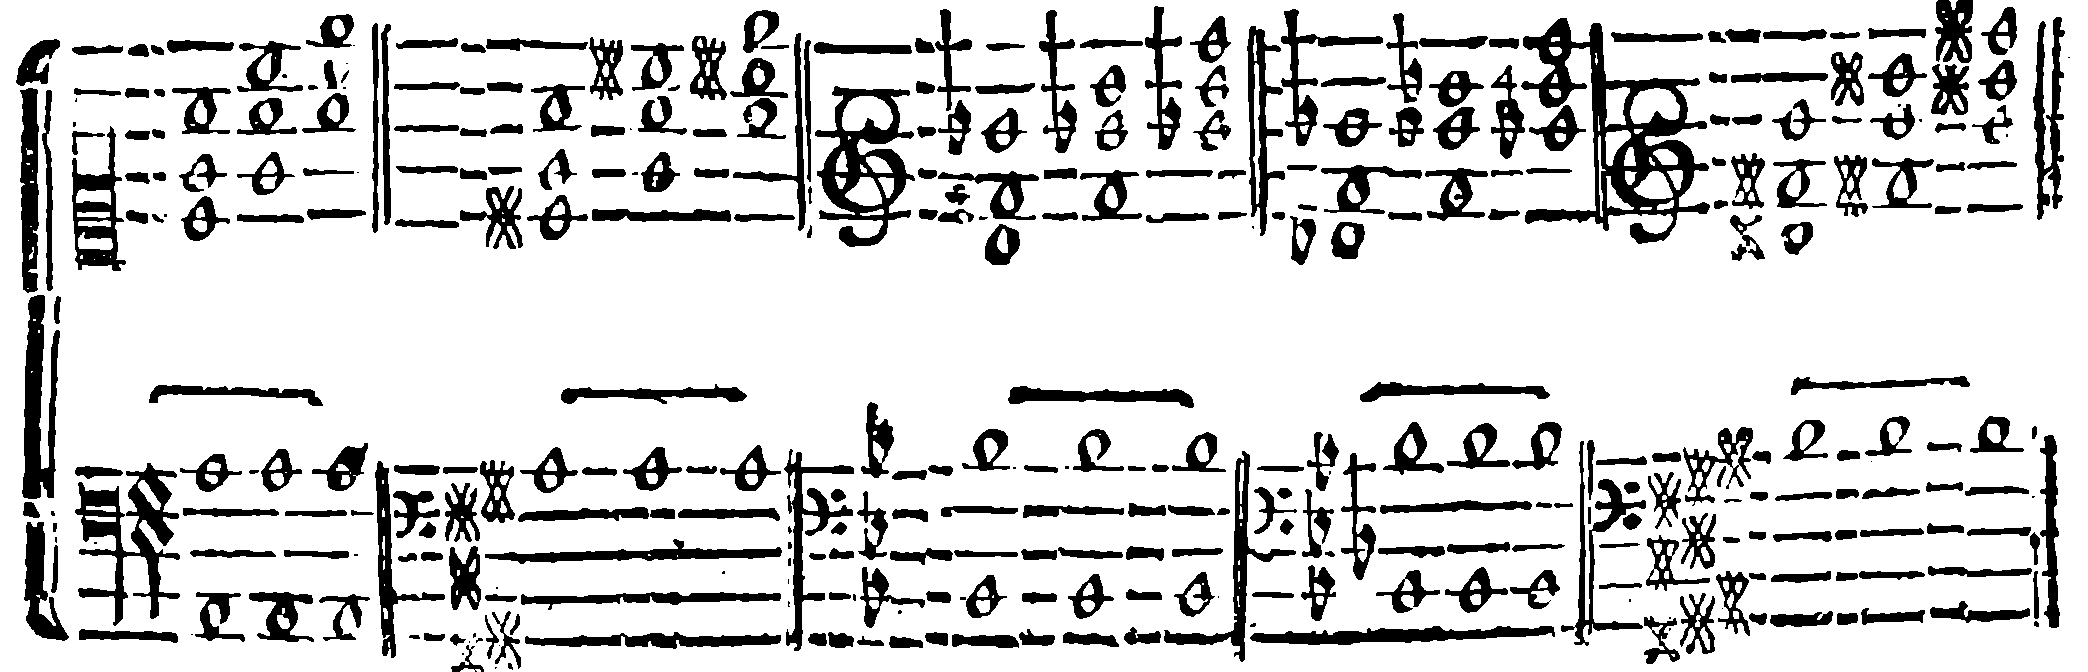
Since the second and fifth fingers always occupy the outer positions of each chord, we have marked only the middle fingers. We shall do so throughout, except where the thumb replaces the second finger. The arrangement of the first three chords applies to all the others. Remember that 1 means the thumb, and 2, 3, 4, 5 continue in order to the little finger.
Before proceeding, be able to move each perfect chord across the entire keyboard, ascending and descending as shown over the octave of C. Arpeggiate every chord evenly from one end of the keyboard to the other, as though all the notes were equal. The finger beginning a new chord must move neither faster nor slower than the finger ending the preceding chord.
When chords ascend, begin with the second finger; when they descend, begin with the fifth. In accompaniment, however, always begin with the second finger, or with the thumb if its use is required.
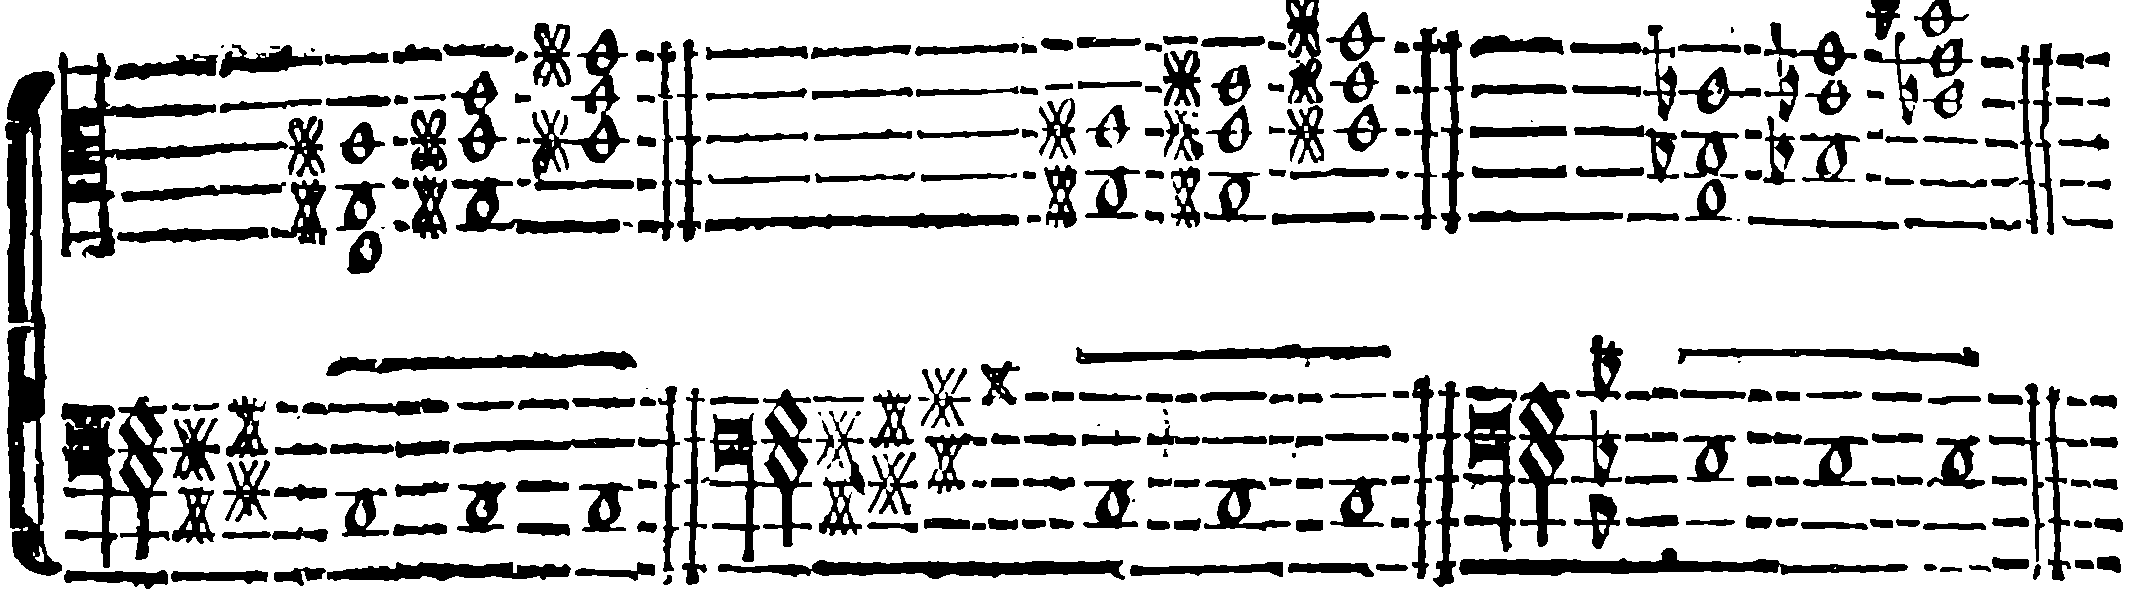
Example of the Sixth Chord, Accompanied by the Third and Octave
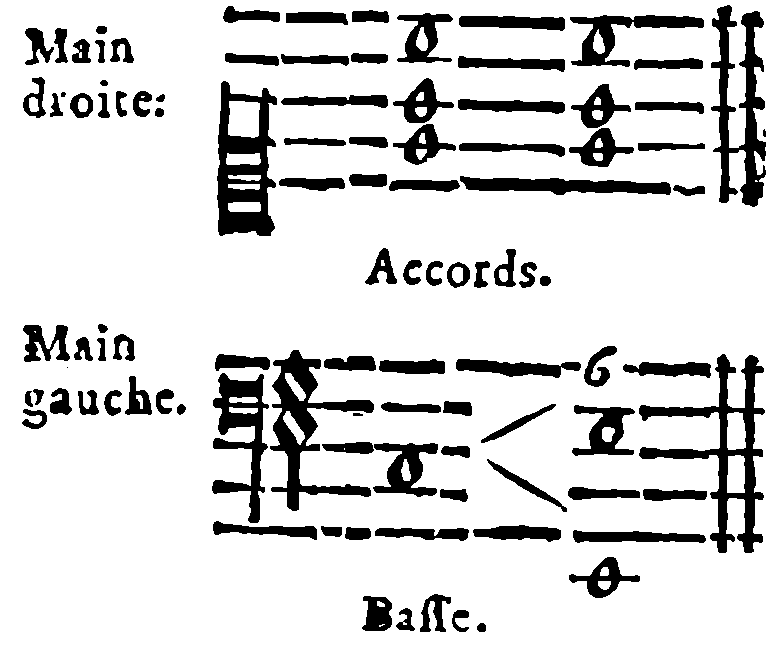
To find a sixth chord easily, play the perfect chord of any note. Without changing that chord, move the bass note a third higher or a sixth lower, which amounts to the same thing. The first note's perfect chord then forms a sixth chord above the changed bass, as the example shows.
Example of the Sixth–Fourth Chord, Accompanied by the Octave
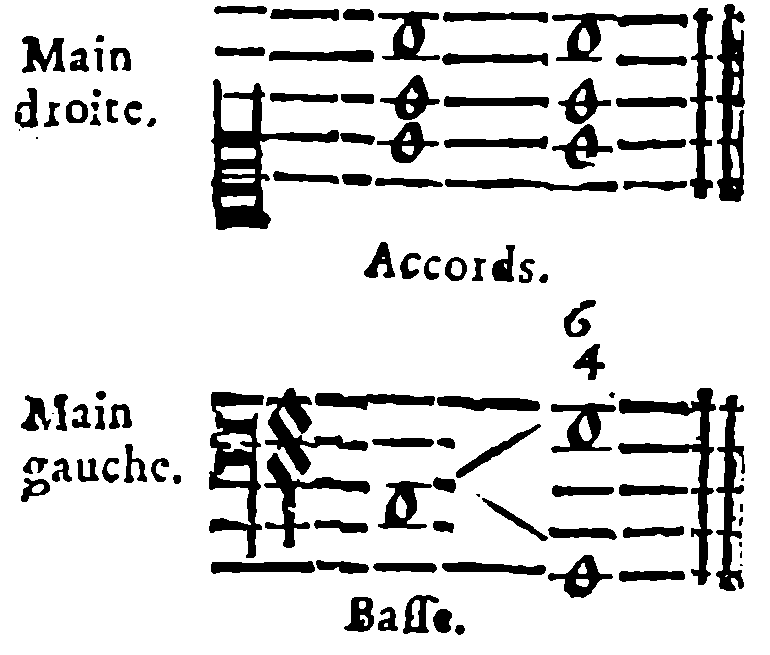
Find this chord in the same way by moving the bass note a fifth higher or a fourth lower.
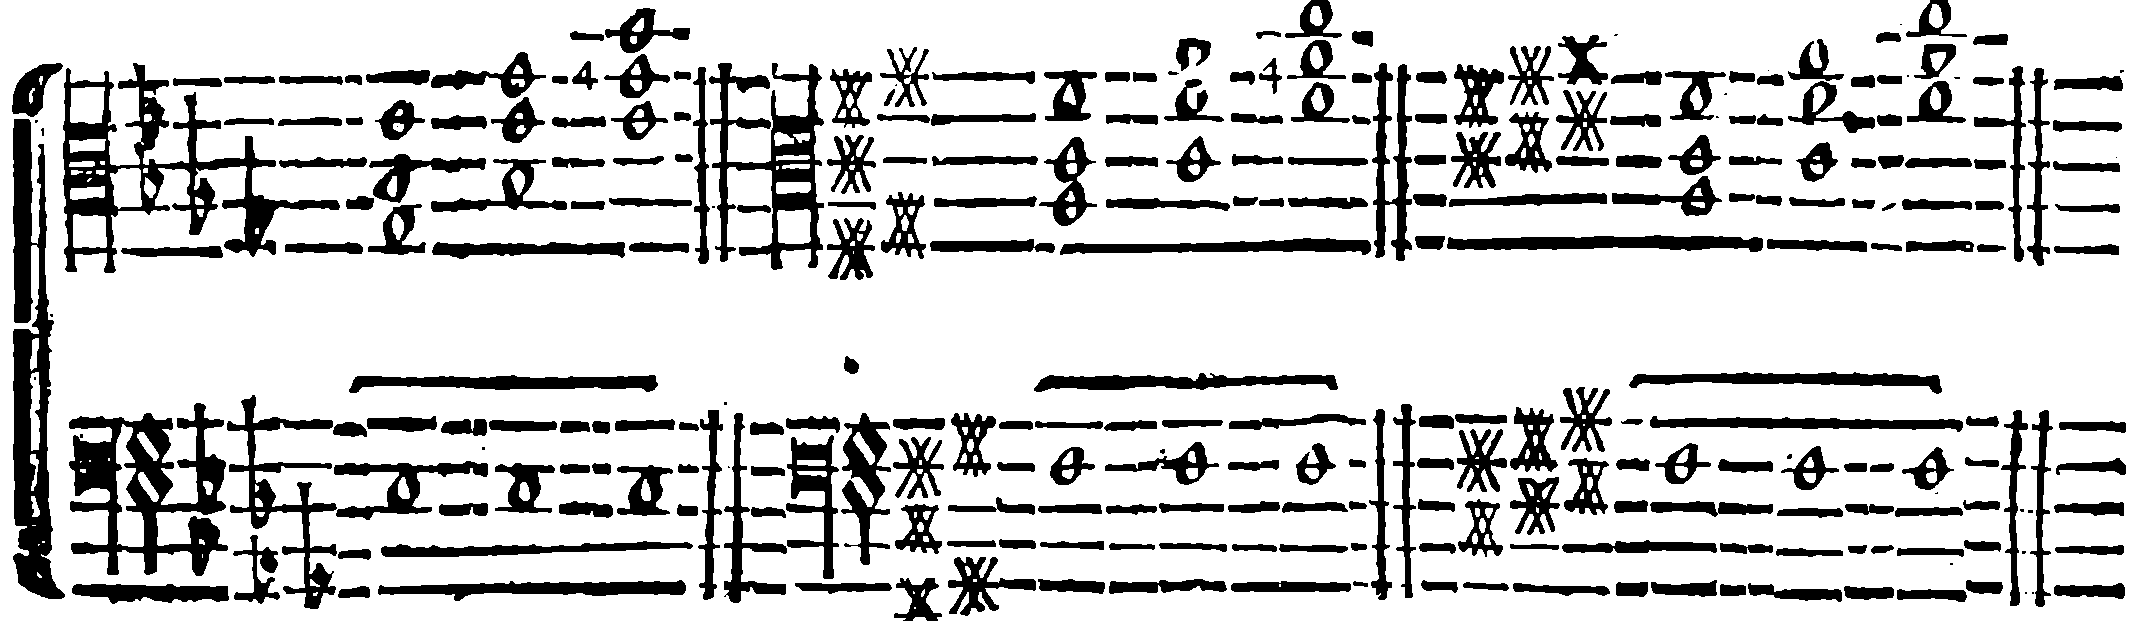
Example of the Seventh Chord, Accompanied by the Third and Fifth
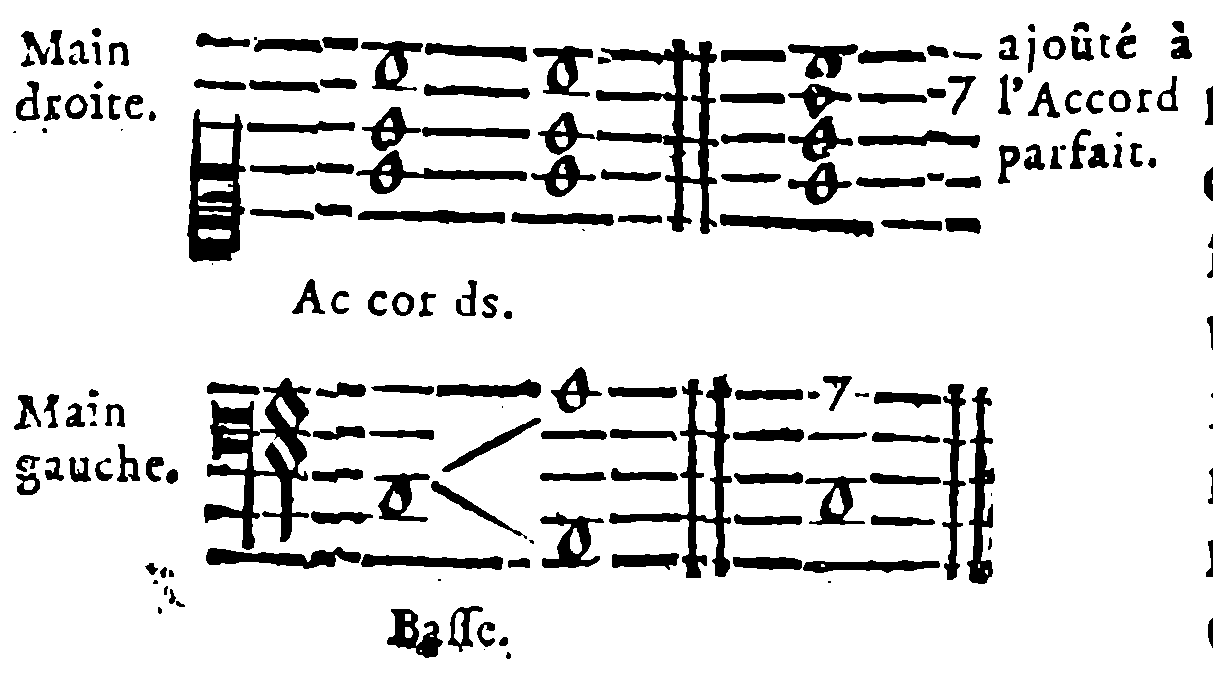
This chord is found like the preceding ones by moving the bass a third lower or a sixth higher. Alternatively, simply add the seventh to a perfect chord without changing anything else. The seventh has the same accompaniment as the perfect chord except for the octave, which is not specified: it may freely be added to or removed from a seventh chord as appropriate. When the octave is added, use all four fingers without the thumb.
Example of the Tritone Chord, Accompanied by the Second and Sixth, and the Second Chord, Accompanied by the Fourth and Sixth
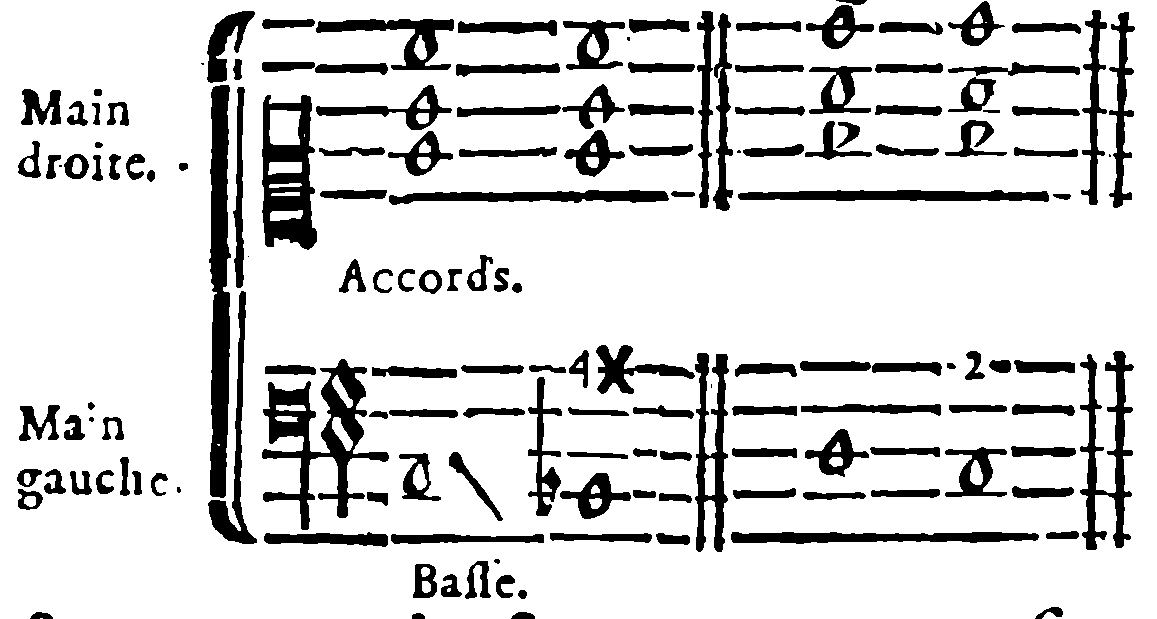
These chords too are found as before, by moving the bass note a whole tone lower. The perfect chord's third must always be major when forming the tritone chord, and minor when forming the second chord.
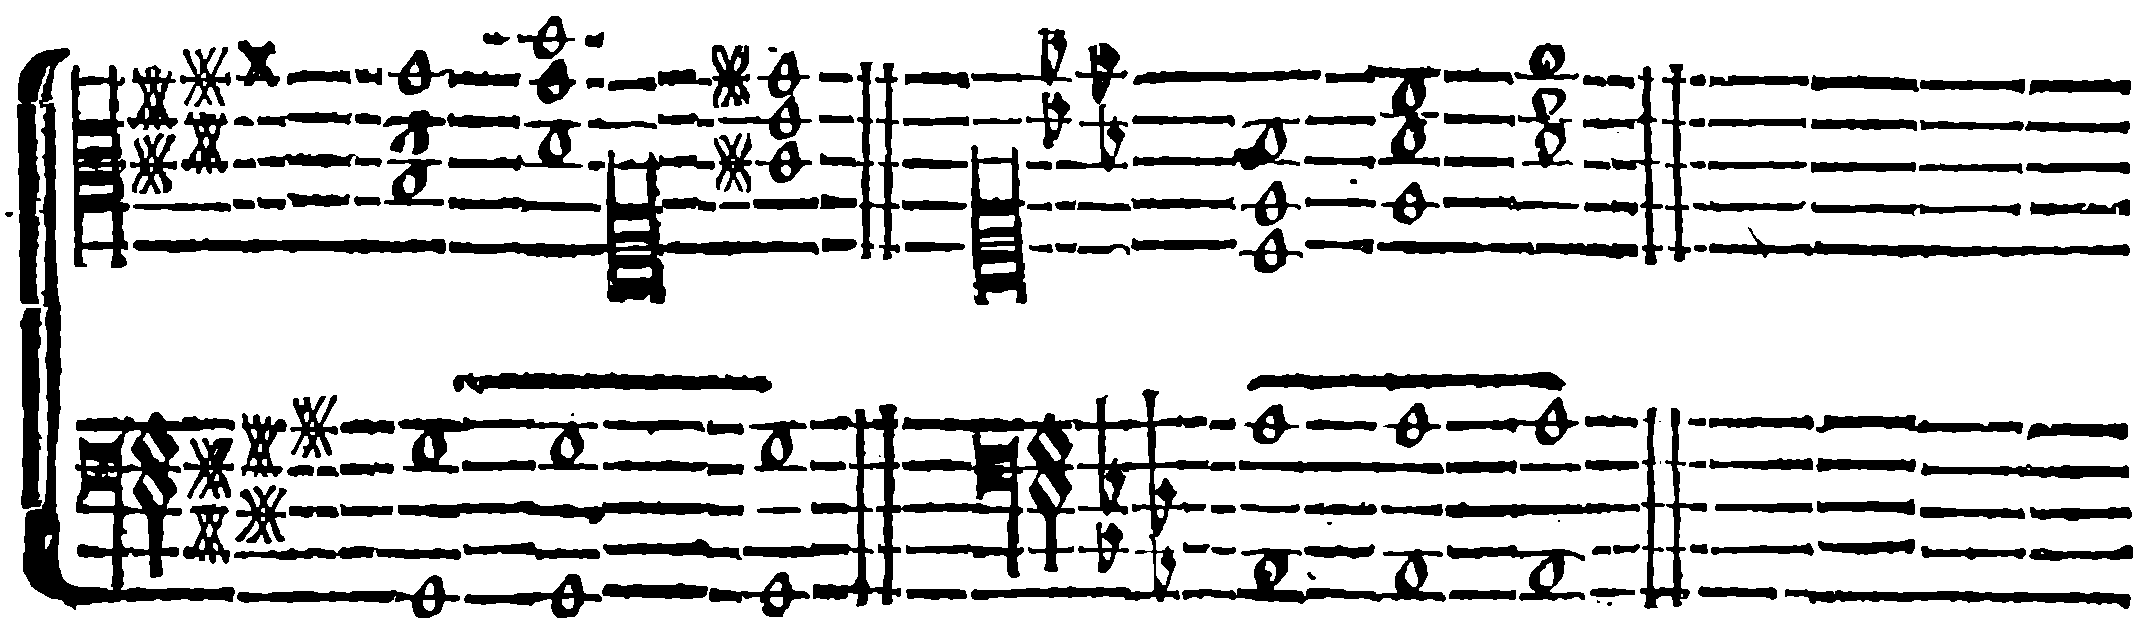
Example of the Fourth Chord, Accompanied by the Fifth and Octave
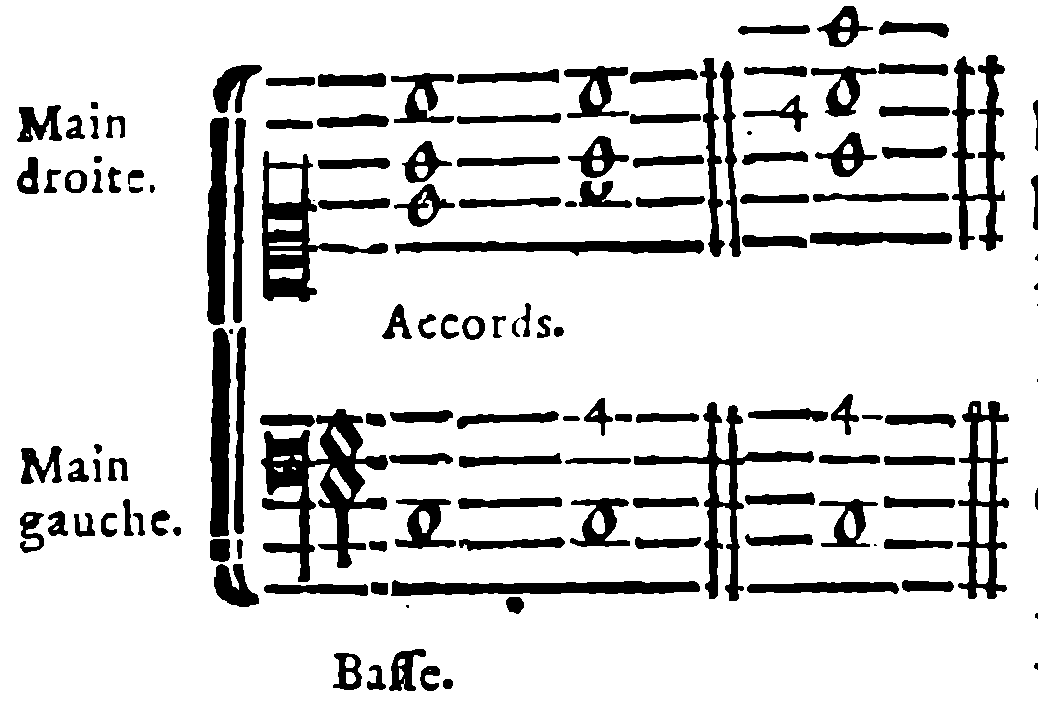
To find this chord, take a note's perfect chord and move its third to its fourth. Remember that when the octave lies in the middle, it must always be played with the fourth finger.
Although these last chords have been illustrated in only one place on the keyboard, practice them on every kind of note and throughout the keyboard, as already required for the perfect chord. Do not alter the fingering, which remains the same everywhere.